> For the complete documentation index, see [llms.txt](https://guide.signspace.com/llms.txt). Markdown versions of documentation pages are available by appending `.md` to page URLs; this page is available as [Markdown](https://guide.signspace.com/en/managing-your-organisation-account/authorise-access-to-organisation-account-information.md).
# Authorise access to organisation account information
Trusted Admin user permission allows access to organisation information on SignSpace. Trusted admin has access to all the spaces owned by an organisation and can add and remove space/group members.\
By default, no one has the Trusted Admin rights. The person who registers an account becomes the Main user. Main users can then create a new authorisation request for the Trusted Admin role (for themselves or for someone else in the organisation).\
The process ensures that only the users authorised by the legal representative of the organisation can have access to all the information owned by the organisation.\
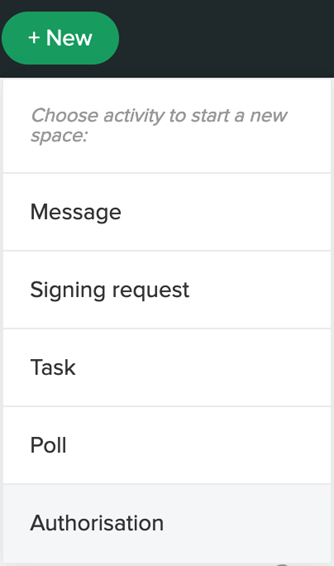
Clicking "Authorisation" under **+New** menu opens a pop-up to create a new authorisation. This option is visible only to Main Users of the organisation.
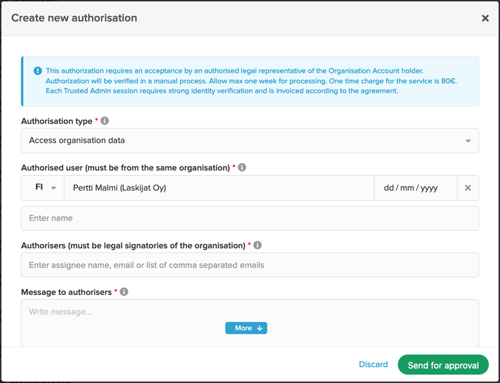
All fields in the authorisation request must be filled.
| **Field** | **Description** |
| ---------------------- | ------------------------------------------------------------------------------------------------------------------------------------------------------------------------------------------------------------------------------------------------------------------------------------------------------------------------------------------------------------------- |
| Authorisation type | "Access Organisation Account data" is selected to apply organisation data access. |
| Authorised user | Name of the user who will be authorised to access organisation data. The user must be a member of the organisation. |
| Country | Nationality of the authorised user is needed to verify the identity of the authorised user. Verification is available for Finnish, Swedish, Norwegian, Estonian, Latvian and Lithuanian nationalities. |
| Date of birth | The authorised user’s date of birth is needed to verify the identity of the authorised user. |
| Authoriser | The authorisation request is sent for signing to the assigned person(s). The assigned person(s) must be a legal signatory or signatories in case 2 persons are required to sign together.
Authoriser’s authority to represent the organisation is verified manually from the business registry once the authorization request has been signed.
|
| Valid till | Validity period of the authorisation must be defined. |
| Message to authorisers | This message will be displayed to the authorisers in the email invitation and on the authorisation request in SignSpace, and it is also visible to the SignSpace Authority Verification group. |
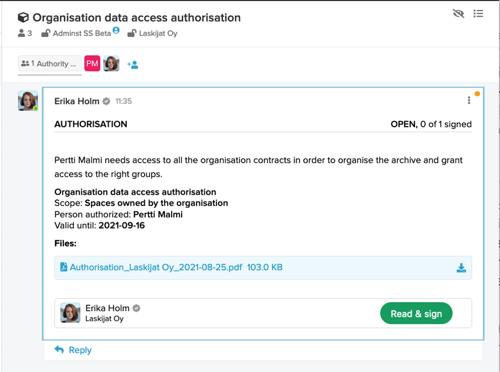
After clicking “Send for approval”, you will be asked if you are OK with the extra cost for manual verification of the legal signatory. “Yes, I accept” will create a new authorisation request. Email notification is sent to the authoriser(s) and a new space is created for the request, related activities and conversations.
Once the authorisation request is signed by the authoriser(s), its status changes to IN VERIFICATION and an automated verification task is assigned to the Authority Verification group, which is a SignSpace back-office function. The authoriser’s authority to represent the organisation legally is verified manually by the group. Processing of the verification may take max. one week. Once the verification is completed with positive outcome, the authorisation request status changes to APPROVED and an email notification is sent inform about the approval.
If the authoriser(s) do not have the required authority, the authorisation request status changes to REJECTED and an email notification is sent to the request creator and the signatories.
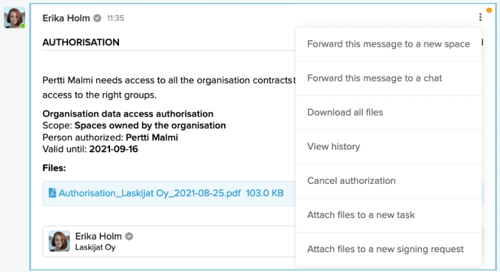
An authorisation request may be cancelled at any time from the menu in the top right corner.
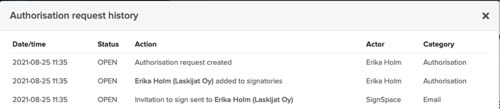
The history report contains a list authorisation related events and is available from the menu in the top right corner.
---
# Agent Instructions
This documentation is published with GitBook. GitBook is the documentation platform designed so that both humans and AI agents can read, navigate, and reason over technical content effectively. Learn more at gitbook.com.
## Querying This Documentation
If you need additional information that is not directly available in this page, you can query the documentation dynamically by asking a question.
Perform an HTTP GET request on the current page URL with the `ask` query parameter:
```
GET https://guide.signspace.com/en/managing-your-organisation-account/authorise-access-to-organisation-account-information.md?ask=
```
The question should be specific, self-contained, and written in natural language.
The response will contain a direct answer to the question and relevant excerpts and sources from the documentation.
Use this mechanism when the answer is not explicitly present in the current page, you need clarification or additional context, or you want to retrieve related documentation sections.